{{+1}}Mackerel{{-1}}
{{start}}
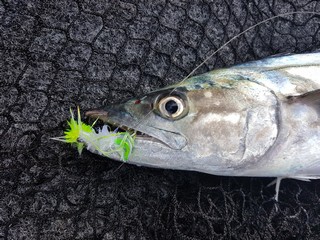
In summer months when baitfish are prevalent Mackerel wont be far away. That is certainly the case in Central Queensland with the prevalent Mackerel being Spanish, Grey, School and Spotted Mackerel.{{end}}

{{+1}}Hammer variant{{-1}}
{{start}}
These soft plastics were inspired by a white soft plastics that I was given in late 2019. It turned out that soft plastic was called a "Hammer" and unfortunately they became unavailable in the early days of Covid 19.{{end}}

{{+1}}Garmin Panoptics – Forward scan{{-1}}
{{start}}
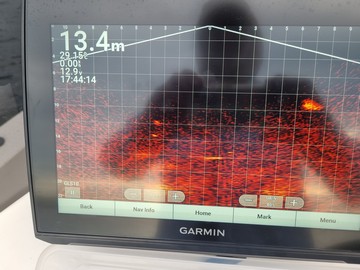
I have set out below a series of photos of all all the screens that you will come across when tuning in your Garmin Sonar to Panoptics Perspective mode.
Basically all you have to do is to open each screen/photo on your Garmin Sonar and change your settings to agree with mine.
TIPS TO KEEP IN MIND
- Don't use or make any changes to your sounder settings unless your transducer is in the water. If your transducer is turned on but is not in the water you run the risk of your transducer overheating and being damaged.
- Don't forget to make the correct selection i.e. "Perspective", "Forward" or "Down"selection on your transducer before deploying it.
Start by turning your Garmin sounder on and then turn your LVS32 or LVS34 transducer on.
In around a minute the "Options" screen/page below will show up on your sounder.

Click on the Panoptix icon.

That will bring up a screen/photo which is a basic layout of the screen as it currently is programmed into your sounder. You may need to go to the "Installation" page and select between "Perspective", "Forward" or "Down" before you can edit the page you want to view or edit.
Click on the menu button toward the right hand bottom of the screen/page.

That will take you to the "Perspective Menu" page.
On that page you will se that the page is identified in to top right hand corner of the page with the page name, in this case, "LiveScope Forward Menu".
As you move forward you will see that all other screens/photos also have their name in top right hand corner.
PROCEDURE TO BE CARRIED OUT ON EACH SCREEN/PAGE IS:
Each page shows a menu down the right hand side of the page describing each setting and to the right of that a description showing either"
- The settings that you should enter in the same position on your sounder, or
- One or more sets of two chevrons that look like this >>. Each of those sets of chevrons will take you to a page related to the page your on.
As you move onto each page/screen change the settings to the same as on my equivalent screen/page.
So, using the "LiveScope Forward Menu" screen/page above as an example:
- In the "Gain" field on your sounder enter 90%
- In the "Depth Range field on your sounder enter 20m
- In the "Forward Range field on your sounder enter 5m
- Leave the Pause Sonar field as it is. If you click on Pause Sonar that is exactly what will happen and you will have to restore the setting to "Pause Sonar" if you want to use your sonar>
- Leave the "Transmit" button on
- Select the first double chevron (>>) that will take you to the "Sonar Setup" screen/page.
- Select the second double chevron that will take you to the "Edit Overlays screen/page.
- Carry out the procedure above to that screen/page.
- Use the "Procedure above on all the other screen/page".
- I have shown each of the remaining screens/pages below in the order I prefer to proceed.

Carry out the procedure above to that page.


HERE IS A SINGLE PAGE SUMMARY OF THE ABOVE PROCESS IN .pdf format
You can of course download this page and take it with you on the water if you find working of an online version difficult. From there you can follow my PDF make the changes to the version currently on your Garmin system.
... hope this is of interest and helpful to you.
Regards, Chatto


{{end}}

{{+1}}Garmin Panoptics / Live scope – Perspective mode{{-1}}
{{start}}
The is the best ever (and least expensive) upgrade that I have made to my Garmin Panoptics set up.{{end}}

{{+1}}Jackall Chubby{{-1}}
{{start}}
This hard body lure has been around a long time and remains one of my favourite bream lures.{{end}}

{{+1}}Shrek – Chatto’s viva{{-1}}
{{start}}
It seems that these days the term 'VIVA' has been given to the very popular and successful colour combination of light green or chartreuse and black.{{end}}


