{{+1}}Fly fishing CQ – my default fly outfit{{-1}}
{{start}}
We are very lucky in Central Queensland in that for most salt water locations there is a range of species you can target.
So what is the best fly rod and set up for our coastal and estuary fly fishing options.
On any given day fishing our local coastal and estuary waters you will have access to a wide range of species to target.
For me it’s mainly “scroungers” that I target. That includes species such as bream, flathead, whiting, mangrove jack, fingermark, barred and silver grunter, various members of the snapper family and of course a range of cod. There are also a few pelagic species that we encounter in these waters such as various trevally, queenfish, blue salmon and occasionally King salmon. Then of course there is always a possibility of a barramundi taking your relatively small scrounger or pelagic fly.
With such a wide range of possibilities in mind and so many varied choices of fly rods, reels etc even with my trout and grayling competitions fly-fishing experiences preparing for and fishing in the World, Commonwealth and Oceania Fly Fishing Championships it took some time to come up with just one gear and set up preference.
If your targeting Bream or Flathead on your #6 to #8 weight gear, don't assume that you wont get a Barra or a Jack, as I have been surprised by big fish taking flies just 50mm long. After many outings fly fishing around Central Queensland coastal and estuary waters I came up with the follow fly gear and set up that works for me.
Overall, I found that a #10 weight rod and a range of target-based leaders works best for me and at this stage I have caught in excess of 38 different Central Queensland species on fly using this set up.
I have settled on Redington Predator series #8 weight 8’3” in length fly rods as my rods of choice for Central Queensland fly-fishing. Whilst Redington is one of the Sage brands these rods are relatively inexpensive to buy. These fly rods have a powerful butt section and a tip that has enough give to load easily with a range of leaders. The reason for leaning toward a shorter rod is that firstly they are easier to handle in a boat and being short they make it easier to fish into structure such as overhanging trees and finally because it’s easier to keep your line below the wind with a short rod.
I like the flexibility of modular reels and a long time ago settled on the Hardy Ultralite 10,000DS modular reel with interchangeable modular spools as my salt water reel of choice. I have #10 weight intermediate, floating and fast sink lines loaded on interchangeable modular spools but more often than not, I only take the modular spool that is loaded with my intermediate line. That covers most coastal and estuary fly fishing requirements. Most fly lines have manufactured loops built in and as the loop at the business end of the fly line is critical to how I use these reels I replace any damaged loops with my own monofilament loops if the loops become damaged.
My leader set ups are much shorter than those I use when fishing for fresh water trout and grayling and my default leader is 30lb Maxima Ultra green monofilament that is connected to the fly line with a loop to loop connection and at the business end I have a size #3 Mustard Fastach clip to make fly changes quick and easy.
The rod, reel and leader described above covers most of my CQ fly fishing requirements but I do carry 3 spare target based leaders on a foam pad. They all have loop connections for easy interchangeable connection to the fly line.
- Spare 30lb Maxima Ultra green monofilament leader with size #3 Fastach clip at the business end.
- For bigger scroungers such as fingermark and grunter I carry a leader that has a 1 meter 30lb Maxima Ultra green monofilament butt section connected with a surgeons knot to a 2 meter tippet of 20lb fluorocarbon with a size #3 Mustard Fastach clip at the business end.
- For bream I carry a leader that has a 1 meter 20lb fluorocarbon butt section connected with a surgeons knot to a 2 meter tippet of 7lb fluorocarbon. I don't use fastach clips on this lighter leader and prefer to tie flies on with a Lefty's loop knot.
{{end}}
{{+1}}Christmas Island Special – pearl pink{{-1}}
{{start}}
There are a lot of colour combinations of Christmas Island Special (CXI) flies that my mates and I have seen on our various trips to Christmas Island and Aitutaki. Some work sometimes and not others and some work more often than not.
The prawn pink coloured and my version of the ring burner he CXI special are my two go to colours and each of those take up twice as much spac as any other colour version in my CXI fly box.
Below is my list of CXI flies that more often than not consistently work. From these I look for local knowledge from my guides as to which fly they will think will work at any given time.
The biggest mistake that guides apparently see is that flies are often overdressed and the proportions below are not followed.
These are the other colours that I find work consistently:
- Pearl prawn - pink (as tied below)
- Orange (Ring burner is a similar fly)
- Pearl prawn - orange
- Pink
- Mauve pearl (Electric camel is a similar fly)
- Yellow pearl
- Pearl prawn - chartreuse pear
Materials for CXI Special - pearl
I have tied this fly below on a size #6 Spirit River SW07 and Fin Racoon over-wing.
| Hook | Threads | Bead | Tail and under-wing | Body | Over-wing |
|---|---|---|---|---|---|
| Gamakatsu SL11-3H or Spirit River SW07 in size #4 to #8 | Hends body thread - orange VP-28 | 5/32"(medium) chrome finish brass dumbbell eyes | Tiewell krystal flash in pearl | Tiewell krystal flash in pearl | Tan Finn Raccoon, craft fur, or rabbit fur |
Process
| A |
|
|
|---|
| B |
|
|
|---|
| C |
|
|
|---|
| D |
|
|
|---|
Pace yourself with the next two steps steps because you want to finish them with enough krystal flash left over for use as the under-wing.
| E |
|
|
|---|
| F |
|
|
|---|
| G |
|
|
|---|
| H |
|

|
|---|
| I |
|

|
|---|
| J |
|
|
|---|
{{end}}
{{+1}}Garmin Panoptics – Down View{{-1}}
{{start}}
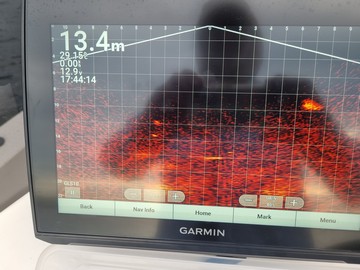
PANOPTICS DOWNI have set out below a series of photos of all all the screens that you will come across when tuning in your Garmin Sonar to Panoptics Down View Mode.
Basically all you have to do is to open each screen/photo on your Garmin Sonar and change your settings to agree with mine.
TIPS TO KEEP IN MIND
- Don't use or make any changes to your sounder settings unless your transducer is in the water. If your transducer is turned on but is not in the water you run the risk of your transducer overheating and being damaged.
- Don't forget to make the correct selection i.e. "Perspective", "Forward" or "Down"selection on your transducer before deploying it.
Start by turning your Garmin sounder on and then turn your LVS32 or LVS34 transducer on.
In around a minute the "Options" screen/page below will show up on your sounder.

Click on the Panoptix icon.

That will bring up a screen/photo which is a basic layout of the screen as it currently is programmed into your sounder. You may need to go to the "Installation" page as shown below and switch to "Perspective", "Forward" or "Down" before proceeding.
Click on the menu button toward the right hand bottom of the screen/page.

On that page you will se that the page is identified in to top right hand corner of the page with the page name, in this case, "LiveScope Down Menu".
As you move forward you will see that all other screens/photos also have their name in top right hand corner.
PROCEDURE TO BE CARRIED OUT ON EACH SCREEN/PAGE IS:
Each page shows a menu down the right hand side of the page describing each setting and to the right of that a description showing either"
- The settings that you should enter in the same position on your sounder, or
- One or more sets of two chevrons that look like this >>. Each of those sets of chevrons will take you to a page related to the page your on.
As you move onto each page/screen change the settings to the same as on my equivalent screen/page.
So, using the "LiveScope Down Menu" screen/page above as an example:
- In the "Gain" field on your sounder enter 90%
- In the "Depth Range field on your sounder enter 20m
- In the "Forward Range field on your sounder enter 5m
- Leave the Pause Sonar field as it is. If you click on Pause Sonar that is exactly what will happen and you will have to restore the setting to "Pause Sonar" if you want to use your sonar>
- Leave the "Transmit" button on
- Select the first double chevron (>>) that will take you to the "Sonar Setup" screen/page.
- Select the second double chevron that will take you to the "Edit Overlays screen/page.
- Carry out the procedure above to that screen/page.
- Use the "Procedure above on all the other screen/page".
- I have shown each of the remaining screens/pages below in the order I prefer to proceed.

Carry out the procedure above to that page.
HERE IS A SINGLE PAGE SUMMARY OF THE ABOVE PROCESS IN .pdf format
230803-PANOPTICS FORWARD VIEW SET UP
You can of course download this page and take it with you on the water if you find working of a camera screen of the above post. From there you can follow my PDF and make the eight changes to the factory settings.


HERE IS A SINGLE PAGE SUMMARY OF THE ABOVE PROCESS IN .pdf format
You can of course print page and take it with you on the water if you find working of an online version difficult. From there you can follow my PDF and
. ... hope this is of interest and helpful to you.
Regards, Chatto
{{end}}

{{+1}}Bream & bass – gear & set ups{{-1}}
{{start}}
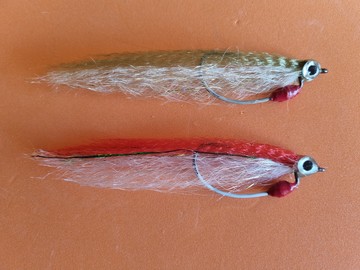
Matching the hatch i.e. what bream and bass (or any fish species for that matter eat) is a fundamental influence on what gear, set up and bait to use to catch a particular species.{{end}}

{{+1}}Recycling a damaged 115mm vibe{{-1}}
{{start}}
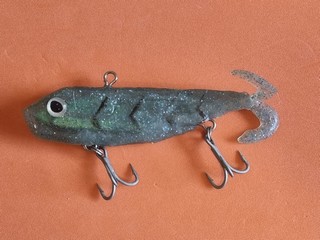
OK its not as good looking as the original vibe but it was a great way to keep myself entertained on yet another windy and wet day.{{end}}

{{+1}}Mackerel{{-1}}
{{start}}
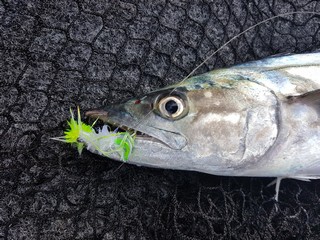
In summer months when baitfish are prevalent Mackerel wont be far away. That is certainly the case in Central Queensland with the prevalent Mackerel being Spanish, Grey, School and Spotted Mackerel.{{end}}

{{+1}}Hammer variant{{-1}}
{{start}}
These soft plastics were inspired by a white soft plastics that I was given in late 2019. It turned out that soft plastic was called a "Hammer" and unfortunately they became unavailable in the early days of Covid 19.{{end}}

{{+1}}Garmin Panoptics – Forward scan{{-1}}
{{start}}
I have set out below a series of photos of all all the screens that you will come across when tuning in your Garmin Sonar to Panoptics Perspective mode.
Basically all you have to do is to open each screen/photo on your Garmin Sonar and change your settings to agree with mine.
TIPS TO KEEP IN MIND
- Don't use or make any changes to your sounder settings unless your transducer is in the water. If your transducer is turned on but is not in the water you run the risk of your transducer overheating and being damaged.
- Don't forget to make the correct selection i.e. "Perspective", "Forward" or "Down"selection on your transducer before deploying it.
Start by turning your Garmin sounder on and then turn your LVS32 or LVS34 transducer on.
In around a minute the "Options" screen/page below will show up on your sounder.

Click on the Panoptix icon.

That will bring up a screen/photo which is a basic layout of the screen as it currently is programmed into your sounder. You may need to go to the "Installation" page and select between "Perspective", "Forward" or "Down" before you can edit the page you want to view or edit.
Click on the menu button toward the right hand bottom of the screen/page.

That will take you to the "Perspective Menu" page.
On that page you will se that the page is identified in to top right hand corner of the page with the page name, in this case, "LiveScope Forward Menu".
As you move forward you will see that all other screens/photos also have their name in top right hand corner.
PROCEDURE TO BE CARRIED OUT ON EACH SCREEN/PAGE IS:
Each page shows a menu down the right hand side of the page describing each setting and to the right of that a description showing either"
- The settings that you should enter in the same position on your sounder, or
- One or more sets of two chevrons that look like this >>. Each of those sets of chevrons will take you to a page related to the page your on.
As you move onto each page/screen change the settings to the same as on my equivalent screen/page.
So, using the "LiveScope Forward Menu" screen/page above as an example:
- In the "Gain" field on your sounder enter 90%
- In the "Depth Range field on your sounder enter 20m
- In the "Forward Range field on your sounder enter 5m
- Leave the Pause Sonar field as it is. If you click on Pause Sonar that is exactly what will happen and you will have to restore the setting to "Pause Sonar" if you want to use your sonar>
- Leave the "Transmit" button on
- Select the first double chevron (>>) that will take you to the "Sonar Setup" screen/page.
- Select the second double chevron that will take you to the "Edit Overlays screen/page.
- Carry out the procedure above to that screen/page.
- Use the "Procedure above on all the other screen/page".
- I have shown each of the remaining screens/pages below in the order I prefer to proceed.

Carry out the procedure above to that page.


HERE IS A SINGLE PAGE SUMMARY OF THE ABOVE PROCESS IN .pdf format
You can of course download this page and take it with you on the water if you find working of an online version difficult. From there you can follow my PDF make the changes to the version currently on your Garmin system.
... hope this is of interest and helpful to you.
Regards, Chatto


{{end}}


