Posts Tagged ‘#spotters’
{{start}}
{{end}}
{{+1}}Spotters Prescription Sun Glasses{{-1}}
{{start}}
I am cranky with myself for not taking up Spotters 2018 Fly Fish Australia teams sponsorship offer for the 2018 Commonwealth Fly Fishing Championships (N. Ireland). I didn't take it up because I still had my original Spotters and my Spotters that were sponsored to me via Fly Fish Australia for the 2016 Commonwealth Fly Fishing Championships (Canada) ... I love my Spotters.
Spotters have been sponsors of Fly Fish Australia representative teams for the World Fly Fishing Championships and the Commonwealth Fly Fishing Championships. As past team member of World, Commonwealth and Oceania teams, Past President of FFA and the most recent life members of FFA I just wanted to put it out that how good their glasses are and how much all our members appreciate their sponsorship. Thanks #Spotters.
{{end}}

{{+1}}Candy – pelagic{{-1}}
{{start}}
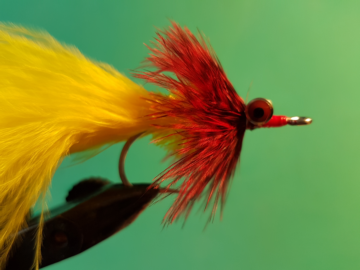
Matching the hatch is the key to catching pelagics such as queenfish, tuna, Australian salmon and herring on fly. These unweighted flies are like candy to pelagic fish because they closely match the form and function of a lot of naturals they are targeting. In smaller sizes, particularly in pink, they are a handy fly for targeting flathead and bream in estuary waters.{{end}}
{{+1}}Christmas Island Special – pink{{-1}}
{{start}}
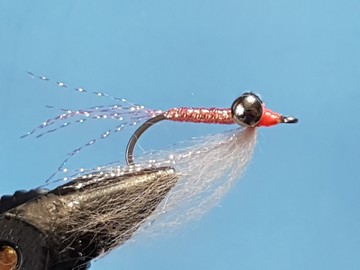
There are a lot of colour combinations of Christmas Island Special (CXI) flies that my mates and I have seen on our various trips to Christmas Island and Aitutaki. Some work sometimes and not others and some work more often than not. This is my list of CXI flies that more often than not consistently work.{{end}}

{{+1}}Articulated swimmer – big fish #4/0 version{{-1}}
{{start}}
My articulated swimmer is one of my most successful prospecting fly for Central Queensland. This #4/0 version has caught everything from barra to bream with plenty of other species in between.{{end}}
{{+1}}The bass season is very close …{{-1}}
{{start}}
|
The bass season is now very close and I’ll be heading off on my first outing for the season which is an outing to |
 |
bass |
 |
Don’t forget the old British Army adage
“Proper Planning and Preparation Prevents Piss Poor Performance”
So here’s a few snippets of information that you might find useful:
This is my gear selection and set up for bass.
These are the fly lines that I believe are best suited to bass fishing.
This is how I set my leader up for bass fishing.
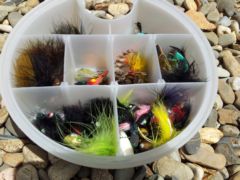
Flies for bass, perch & saratoga
And, if you want to learn to tie bass flies check this out.
{{end}}

{{+1}}N. Ireland – Fishing Report 2018 Commonwealths{{-1}}
{{start}}
Fantastic event that was well organised and mostly equally well executed.
My rotation for the competition was:
  |
DENNETT RIVER
On day one my departure time for my Dennett session was 7am.
Competitors were supposed to be dropped of at their beats with at least 1 hour of time available to set rods up and walk their beats. Unfortunately the controller that was to look after the drop off's did not arrive and Harvey, the sector Judge, had to take on that role. That meant that I was not dropped off until 8:55 am at beat #3 just 5 minutes before the session was due to start. My controller gave me just enough lee way in the start time to set up only one rod and no time to walk the beat.
Given those constraints I decided to set up only one rod with a floating line and a tapered leader terminating with a 2.0 mm micro ring. Below the micro ring I had a 1.4 meter leader of .10mm fluorocarbon with a dropper 0.8 meter from the point That gave me to options of four different techniques I could apply as I moved up the river:
- Two nymphs - I note that for my nymphing I opted to use Neon Wax as my indicator rather than a coloured section in my line as an indicator as the water was fairly clear and very shallow, it's easy to remove the neon Wax if fishing dry flies and I was concerned about spooking fish.
- Nymph under dry
- A single dry fly.
- Swinging spiders etc
My controller told me he had walked the beat and there were only a couple of points of access because of the high bank and stinging nettles. He pointed out the first access point just up from the bottom of the beat so I started fishing there.
The water there was a shallow glide below a shallow run so I started with a single size #16 brown klinkhammer with a pink post. I managed a couple of very small fish in that glide with the smallest being just 7cm. Even though the run was shallow I swapped over to two #16 TBH nymphs and, toward the back of the run, managed a 21cm rainbow and couple more undersized fish. The best looking part of the run was above that but it did not produce any hits. This was something we had also seen during practice with the majority of fish caught by the team being in the back part of runs.
There was no water in the beat deeper than knee height and there were two more similar glides with shallow runs in the beat which I repeated the above process on catching several more small fish but no more measurers.
These are the flies that I landed fish on:
 |
 |
 |
 |
 |
| #16 / 2mm copper TBH Dross variant | #16 / 2.5 mm silver TBH Dross variant | #16 / 2mm gold bead head skinny flash back PTN | #16 / 1.5mm copper TBH head orange | #16 / non bead head slightly weighted Dross nymph variant |
LOUGHMACORY FISHERY
This is a serious bit of water and reminiscent in size of many of our smaller freshwater lakes in Australia. It has a margin of heavy weed along the edges breaking up to nice weed patches and gutters as the water deepens generally to around 8 meters in depth. After that it drops off to much deeper water. During our practice session we (and I am sure every other angler) had found fish sitting where they had been stocked directly in front of the shop and also further along the shore in front of the boathouse. They may also have been stocked in other areas and not located during the practice sessions.
My boat partner here was Brian who ultimately won the gold medal for the competition.
I set up with my slime line with my olive straggle UV dog nobler that had worked well during practice on the point, and two flies that had worked well for other team members on Loughmacory during practice. A chartreuse cats whisker in the middle and an orange blob on the bob.
 |
 |
 |
Brian set up with a floating line and two blobs. One was orange and the second was orange and yellow. I am not sure what his bob fly was and I don't think he caught a fish on it.
At the end of the first hour Brian had me 3 zip up so I swapped the middle dropper over to a tequila blob.
 |
 |
 |
I started to get hits and by the end of the session I had 7 fish and Brian had 6 … a good recovery.
WOODFORD FISHERY
This was my third session venue. Our bus headed off from the hotel at 12noon on the second competition day.
Woodford is a small water fishery set on a 7 acre property and is about 100 meters average width and probably 400 meters long making it around just 5 acres. It’s relatively shallow at the shop end and deepens up toward the opposite end. It has around 50 pegs with small timber fishing platforms at each peg. For the competition 16 of those pegs had been remarked as our beats. The process here was really interesting and a lot more demanding than any bank session I have previously fished in a competition . At the briefing we found out that we would each start on our nominated beat which we would fish for just half an hour, then a whistle would sound and we would each have just 5 minutes to move around 3 beats anti clockwise and then another whistle would sound singling the start of the next half hour of fishing. That was repeated 6 times giving the 3 hours of fishing. My rotation was pegs 14,2,5,8,11,14 and finishing on peg 16.
As a team we had settled on three techniques for Woodford so I set one rod up for each.
1) Rod 1 - Floating line with a washing line set up. I had selected a white and coral booby on the point and two size #12 crunchers.
 |
 |
 |
2) Rod 2 - Slime line with a team of pulling flies. I had settled on my gold TBH dog nobler on the point a chartreuse and white cats whisker on the middle dropper and an orange blob on the top dropper.
 |
 |
 |
3) Rod 3 - Craig C had done well with two boobies 6 feet apart tweaked along the bottom on a type 5 line and I had ranked this as my reserve option if the wind was in my face or I had not had a fish after two hours on either of my first two set ups.
 |
 |
Beat 14 was on the lee shore and partially protected from the wind so I started with rod 1. I had a double hook up on my first cast. The fish on the top dropper broke off at the fly early in proceedings but I was able to land the other fish on the booby. I managed a second fish in the first rotation on the lighter cruncher.
The first beat rotation took me round to the other side of the lake with the wind in my face for that rotation on beat 2 and the next rotations on beat 5. I could not cast the booby far enough into the wind so I swapped to and rotated between rods 2 and 3 for those beats with no touches.
The 4th rotation put me on beat 8 with wind over my left shoulder and as I was approaching the deepest end of the lake I took part of my fishing time to put my rod 2 leader onto my rod 3 rod which had the type 5 line. I fished that slow and deep for the balance of the half hour with no takes.
I continued that technique for the 5th rotation on peg 11 which fronted onto the deepest part of the lake and and the wind almost at my back and landed on the dog nobler my third fish.
For the last rotation which was back on my first peg 14 and with the wind at my back I went back to the sweep line and the washing line team and whilst I had a follow and a couple of swirls i didn’t get another hit.
So I finished the session with 3 fish.
STRAID FISHERY
This is a small shallow lake with an average depth of probably only 6 feet.
In our practice on Straid the best two techniques for our team had been my washing line set up on a floating line and for Craig C a team of two dry flies and covering fish.
There were not as many fish moving about as in our practice sessions so I opted for the washing line with the same team that had worked for me in practice which was my white and coral blob on the point, a cruncher in the middle and a daddy on the top dropper.
 |
 |
 |
I had a number of swirls and follows but no takes. In the mean time my boat partner had set up with two floating flies and had managed a fish. I swapped over to a two dry fly leader with a #14 brown klinkhammer on the point and a #14 Adams para dun six feet above that on the dropper. I hooked 2 fish but in each case they spat the hook just short of the net.
 |
 |
I note that my boat partner was using a 2 meter net and fared much better netting one more fish. I was using a 1.2 meter net as per Fips Mouche rules.
In the last hour the surface action basically stopped so I swapped back over to 3 flies on the floating line with my olive dog nobler on the point a chartreuse cats whisker in the middle and a small orange blob on the bob and whilst I manage a follow did not hook up.
 |
 |
 |
My boat partner in the meantime had a chartreuse squirmy wormy on the point and manage a couple of good hits and one further fish.
I note that the previous day we had worked out that chartreuse squirmy wormies were a great fly for all three lakes but unfortunately we had also found that amongst all the materials that the team had on hand we had none of the chartreuse squirmy wormy materials to deploy on flies.
QUIGGERY RIVER
My last session was on the Quiggery River at beat 14. This was a long beat that except for the first 50 or so meters was hard to negotiate from the shore. Access to the water was also difficulty with a steep stinging nettle bank.
I had been very pleased with my one rod set up on the Dennett and so I opted to use the same set up and flies on the Quiggery but with more emphasis on copper and gun metal TBH’s because of the tannin stained water.
I manager 8 or 9 fish on the Quiggery with one on the #16 brown klinkhammer with the purple post and one on the #16 / 2mm gold bead head skinny flash back PTN.
Overall I felt that I fished very well but my position was pulled back with the blank on the Straid. Anyway I finished up in 4th place in our team of 10 from Australia and 40th out of 86 in the overall competition.
{{end}}
{{+1}}Perdigon (Spanish nymph) – gold micro glint{{-1}}
{{start}}
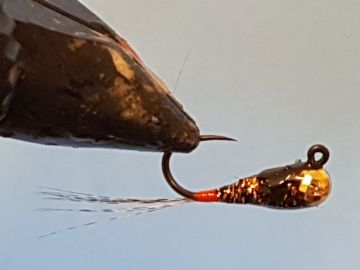
| A streamlined fast sinking fly that will anchor your team. |
Materials
| Hook | Head | Extra weight (optional) | Thread | Tail | Body | Thorax | Coating |
|---|---|---|---|---|---|---|---|
| Hanak 300BL #14 / #16 | 3.0mm / 2.5mm slotted faceted gold tungsten bead | 0.010 lead wire | Fl fire orange UTC UV thread | Coq de Leon Fibres | Brown Micro Glint | Black nail polish | UV Resin and then Varnish. |
Process
| A |
Adding extra weight to the fly.On this fly my preference is to keep the bead size down a little and to add extra weight to compensate for that. |

|
|---|
| B |
|

|
|---|
| C |
|
|
|---|
| D |
|

|
|---|
| E |
|

|
|---|
| F |
|

|
|---|
{{end}}
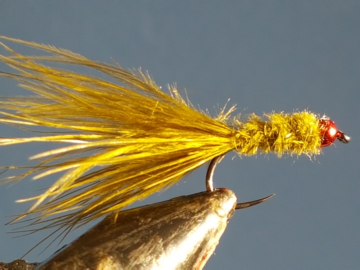
{{+1}}Red TBH damsel{{-1}}
{{start}}
I first used this fly in Canada in 2016 at the Commonwealth Fly Fishing Championships. Tied by Josh Flowers from Tasmania I doubt that a session on the lakes passed without every team member tying this fly on for at lease some of the time. I have since learned that it’s a very successful fly in Central Tasmania at any time when damsels are around.{{end}}
{{+1}}NSW – Fishing season reminders{{-1}}
{{start}}
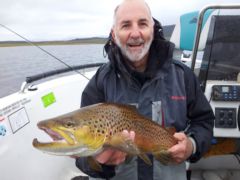
Closed seasons for popular fresh water species in NSW for 2018.{{end}}


